TL;DR: Is it hard to mount a TV? For most people, it’s manageable with the right tools, a solid wall, and careful measuring. The key steps are locating studs, matching the mount to your TV’s VESA pattern, and keeping the bracket level. Brick, plaster, fireplace walls, and TVs over 65 inches can make the job more difficult, so those installations may be better left to a professional.
In this guide
- Understanding TV mounting challenges
- Choosing the right mount for your TV
- Understanding VESA mounting holes
- DIY TV mounting: What you need to know
- Step-by-step guide to mounting a TV yourself
- Common mistakes in TV mounting
- Professional installation: When to consider it
- Tips for a successful TV mounting
- Professional service from Geeks on Site
- Summary
- Frequently asked questions
Is it hard to mount a TV? It can be, especially if you’re not familiar with the process. So how hard is the job, really? For most people with the right tools and a free afternoon, it’s very doable. The tricky part is getting the details right: the right TV mount, solid anchoring into studs, and a TV on the wall that sits level and secure.
In this guide, we walk you through the challenges, share DIY tips, and explain when it might be better to let our team step in and handle the work professionally. Our goal is to help you mount your TV safely, securely, and without unnecessary stress.
Understanding TV Mounting Challenges
When we mount a TV, one of the first things we evaluate is whether the wall can support the TV’s size and weight. Mounting a TV on drywall without the right support points can compromise stability and potentially damage the wall. We always check for wall strength and ensure the surface can handle the load. A wall mounted TV puts constant stress on its anchor points, so the mount and bracket are only as strong as the surface and studs behind them.
Another common challenge is ignoring weight limits or failing to locate the center of each wall stud. The wall’s integrity matters just as much as the mount itself, and proper anchor points are essential for a safe installation. Many DIY mistakes happen because wall studs are overlooked or incorrectly located. A stud finder takes the guesswork out of this step, and anchoring the bracket into two studs is the standard we follow on every installation.
Hidden obstacles inside walls, such as wiring or plumbing, can also complicate the process. Plaster, brick, and concrete walls add their own challenges, and mounting above a fireplace requires additional safety considerations. Many interior walls in U.S. homes use drywall over wood studs, which is generally one of the easier setups for TV mounting. Brick and concrete are strong, but those materials call for masonry drill bits, different anchors, and more time on the job.
While DIY can save money, it also increases the risk of mistakes or damage if the process isn’t handled correctly.
Choosing the Right Mount for Your TV
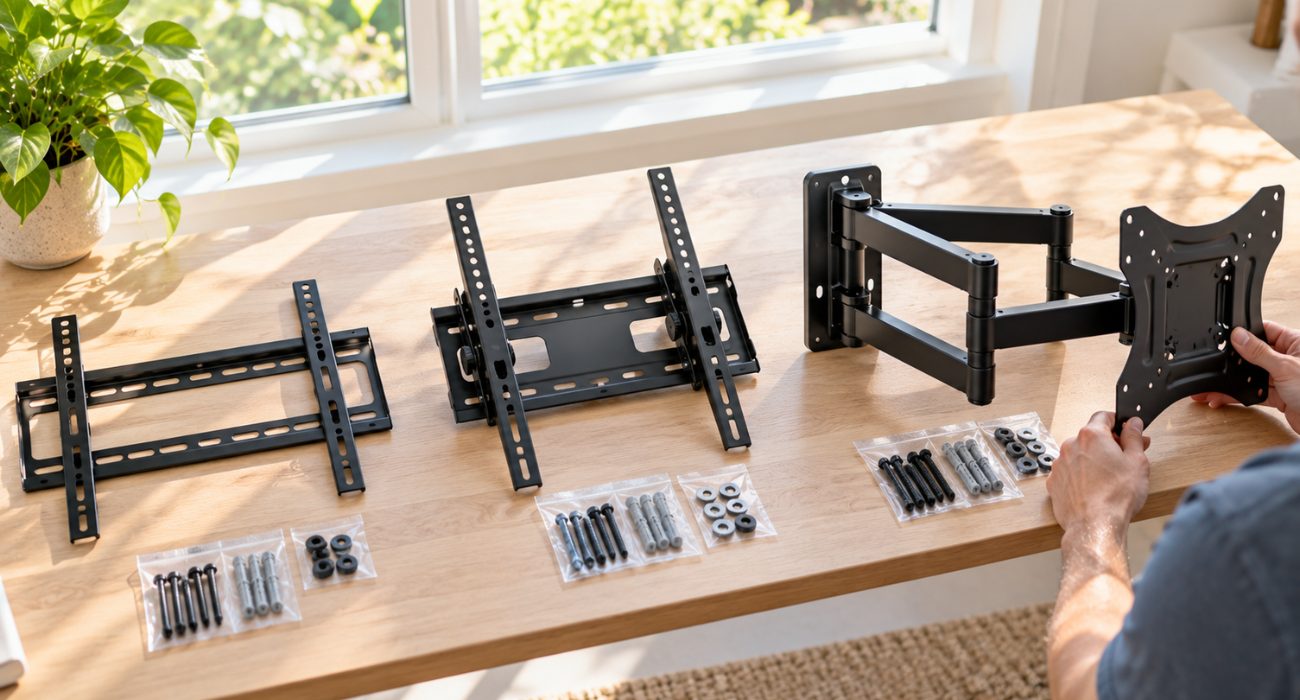
Picking the right mount is half the battle. Most TV mounts fall into three categories, and each one changes how your screen sits on the wall and how much space it takes up. The best choice depends on how you want your wall mounted setup to look and function.
Fixed Mounts
A fixed TV mount keeps the screen flat against the wall. It’s the slimmest option and works best when the center of the screen sits near eye level and the room doesn’t get much glare.
Tilting Mounts
A tilting mount lets you tilt the screen down a few degrees. This helps when the TV needs to sit a bit higher on the wall, like over a console or in a bedroom where you watch from bed. A slight tilt also cuts glare from nearby windows.
Full-Motion Mounts
Full-motion mounts pull out from the wall and swivel so you can change the viewing angle. They’re great for open layouts and corner setups, but the extended arm puts more leverage on the wall plate, so anchoring into studs matters even more with this type of TV mount.
Before you buy, check the weight rating and screen size range on the box, and confirm the TV bracket matches the hole pattern on the back of your set.
Understanding VESA Mounting Holes
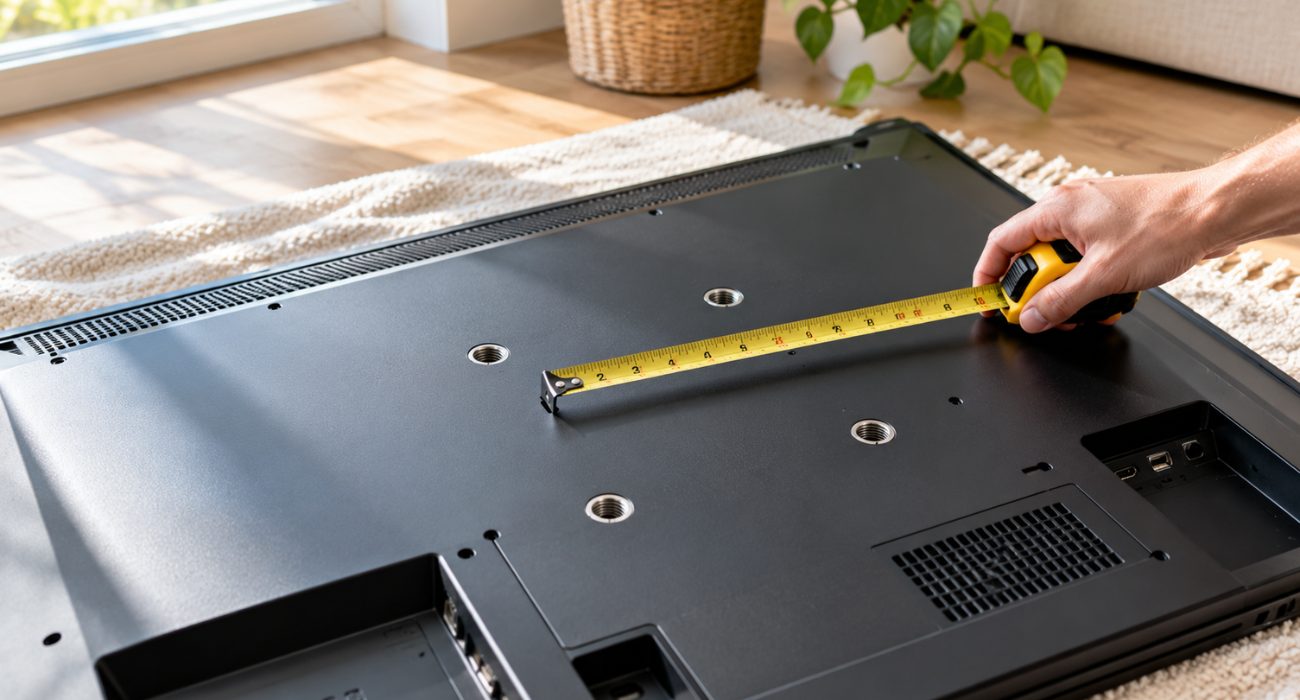
On the back of nearly every flat-screen TV, you’ll find four threaded mounting holes arranged in a square or rectangle. That layout follows a standard set by the Video Electronics Standards Association (VESA), which is why you’ll see numbers like 200 x 200 or 400 x 400 on mount packaging. Those numbers are the distance between the holes in millimeters, measured horizontally and then vertically.
To check yours, use a tape measure to measure from the center of one hole to the center of the next, or look up your model’s VESA size in the manufacturer’s instructions. If the pattern on the TV bracket doesn’t match, the mount won’t fit, no matter how sturdy it is. It’s a quick check that saves you a return trip before you commit to a wall mounted setup.
DIY TV Mounting: What You Need to Know
Mounting a TV yourself can be rewarding, but it requires the right tools, careful preparation, and an understanding of the mounting process. If you plan to mount a TV yourself or hire a professional later, knowing the basics will set you up for success. For a first-timer, mounting a TV on the wall usually takes a couple of hours from start to finish, so gather your tools before you install the mount.
This is especially important if you’re wondering whether you need a stud finder to mount a TV or if you’re looking for our TV Mounting Guide for Beginners.
Before drilling any holes, take time to prepare your wall and gather everything you need.
Necessary Tools and Materials
To get started, you’ll need:
- A stud finder to locate wall studs spaced 16 or 24 inches apart
- Toggle bolts or secure anchors for medium to heavy TVs
- Compatible mounting hardware and a sturdy TV mount
- A power drill with bits sized for your lag bolts and wall type
- A tape measure and pencil to mark height and stud spacing
- A level to keep the bracket straight
- A socket wrench to fully tighten the lag bolts
Make sure you know your TV’s weight so you can choose the appropriate anchors and mounting bracket. When drilling pilot holes, they should be slightly smaller than the mounting screws to ensure a snug and secure fit. Keep the manufacturer’s instructions handy too, since each mount lists the exact hardware, screws, and wall materials it was tested with.
Preparing Your Wall
Here are the key steps we take to prepare a wall:
- Select a structurally sound wall
- Consider the material (drywall, brick, concrete, plaster)
- Use the correct mounting hardware for the TV model
Most mounting brackets include templates that make marking drill points easy. We often use painter’s tape to outline the TV’s footprint and visualize placement before committing to drilling. After finalizing the position, we mark the exact mounting points. If your bracket doesn’t come with a paper template, you can make one from cardboard by tracing the mounting plate. Then mark where each of the holes goes and tape it to the wall to check the position.
Brick or stud walls are ideal because they offer the strongest support. If mounting on drywall alone, proper anchors designed specifically for this use are essential. With drywall over wood studs, drive each lag bolt into the center of the studs, not near the edge. On brick, drill into the brick itself rather than the mortar joints, which can crumble under load, and use tools and anchors rated for masonry.
Step-by-Step Guide to Mounting a TV Yourself
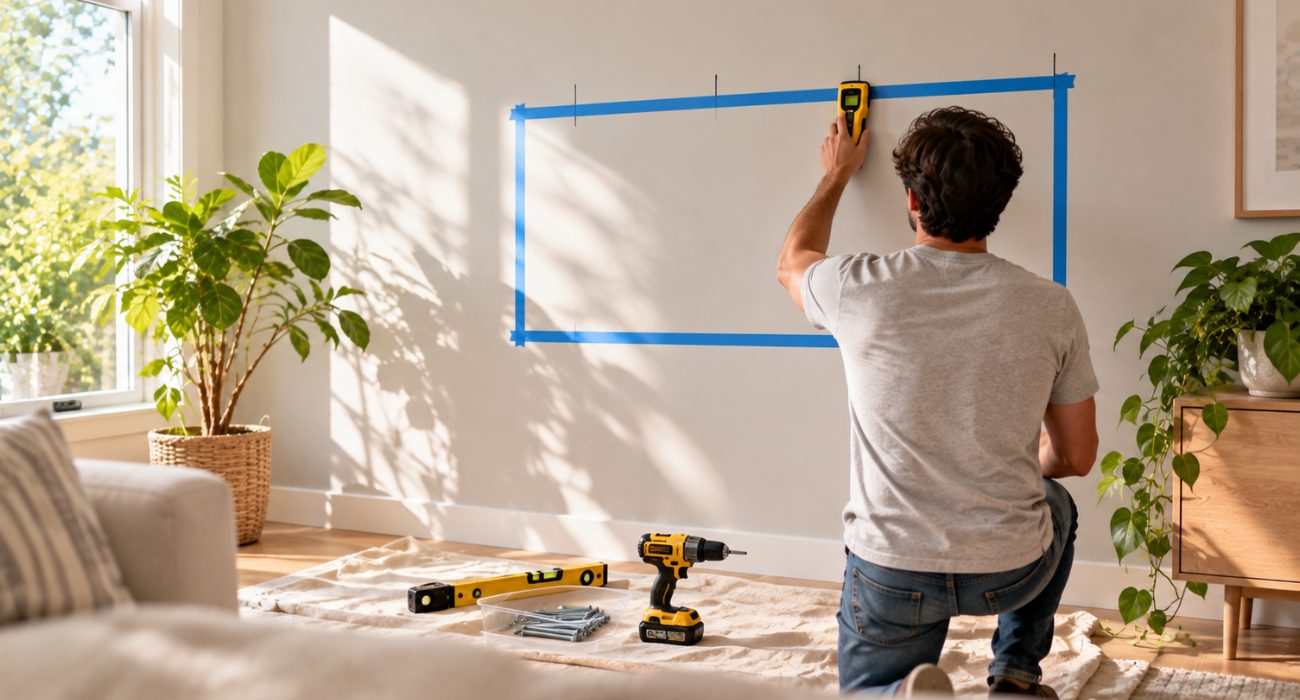
Below is a simplified version of the steps we use during installation. Having a partner nearby can make the job safer and easier. Drilling pilot holes remains a crucial step to avoid wall damage and ensure accuracy. These steps apply to most walls with wood studs. Brick walls follow the same order but use masonry anchors and materials made for that surface.
1. Measuring for the Best Height
Start by deciding where the center of the screen should land. In most living rooms, the best height puts the middle of the display at eye level when you’re seated, roughly 42 inches from the floor.
Use a tape measure to find that point, then figure out where the wall plate needs to go based on how far the mounting holes sit from the center of the set. Mark that position lightly in pencil before you drill. Getting this right helps keep a wall-mounted TV comfortable to watch for years.
2. Finding Studs and Marking Positions
A stud finder is the easiest way to locate studs, which are normally spaced 16 or 24 inches apart. Once you find them, mark the center points. This helps ensure the mount will be securely attached and properly aligned.
Run the stud finder slowly across the wall and confirm both edges of each stud before you mark the center. A small finishing nail tapped in where the bracket will cover it is an easy way to double-check that you’ve hit solid wood. If you can only locate one of the studs you need, slide the bracket over rather than skipping it.
3. Drilling Pilot Holes
Pilot holes make it easier to insert screws and prevent damage to the wall or studs. They also help avoid wood splitting and make sure the mounting hardware sits correctly.
A power drill is required for this step. Drill straight into the center of the studs and keep the holes level with each other so the bracket doesn’t twist when you install the lag bolts.
On drywall, a slow, steady speed keeps the paper face from tearing around each hole. Double-check every mark with the level before drilling.
4. Securing the Mounting Bracket
Lag bolts create a stronger, more secure connection compared to standard screws. Before tightening fully, we always make sure the mounting bracket is perfectly level.
Once everything is aligned, the bolts can be tightened completely for maximum stability. Fully tighten each bolt only after that level check, then give the bracket a firm tug to confirm it’s locked into the studs with no movement at all. That tug test is your green light to attach the TV to the mount.
5. Attaching the TV to the Mount
Next, attach the vertical arms to the back of your TV using the screws from the kit that fit its threaded holes. It’s easier to install the arms while it lies face down on a soft blanket. Don’t force a screw that feels too long, since it can damage internal components.
With a helper, lift the TV, hook the arms onto the bracket, and lock the safety screws or tabs so it can’t lift off the mount. The studs carry all of that weight, and this is the part of the installation where a second pair of hands really helps. Once it’s locked in, step back and check that your TV on the wall sits level from your seat.
6. Managing Cables and Wires
Plan your cable management before the TV goes up on the mount. Loose cables and wires hanging below the screen look messy and can become a tripping hazard. Paintable raceway covers are a simple way to keep the setup clean, while in-wall kits rated for power can hide wires but require cutting into the drywall. Never run a standard TV power cord directly inside the wall.
If you want concealed wiring, a professional can help you choose and install a code-compliant solution.
Common Mistakes in TV Mounting
Mounting a TV involves more than attaching a bracket to the wall. Avoiding common mistakes helps ensure a safe and visually appealing setup.
Choosing the Wrong Wall
Selecting the right wall is vital. It should have access to power outlets and allow the TV to sit at eye level. We avoid mounting on old, cracked, or weak drywall because it reduces stability. Also think about where you’ll watch from most often, how much sunlight hits the screen during the day, and where the studs fall behind it.
Always secure the mount into at least two studs using multiple screws. This reduces the risk of the TV detaching from the wall.
Incorrect Mounting Height
Mounting your TV too high can cause neck strain and affect your viewing experience. Before drilling, we consider the TV’s size, the room layout, and seating height to determine the ideal mounting height.
A level bracket ensures the TV sits straight and enhances comfort and aesthetics. In bedrooms, or any room where you watch from a reclined position, placing the TV slightly higher and adding a downward tilt can work well.
Relying on the Wrong Anchors
When your stud finder shows the studs aren’t where you need them, use heavy-duty anchors rated for both the load and your TV mount, and skip the small plastic anchors that come with some kits. Those are made for picture frames, not a wall mounted display that pulls away from the drywall every day. If the studs don’t line up with your preferred TV position and the mount can’t safely accommodate the spacing, that’s usually a good reason to get a professional opinion before you drill.
Overlooking Safety in Busy Homes
Kids climbing on furniture or pets running through the room can bump into furniture or tug on cables connected to a TV on the wall, especially when a full-motion mount is extended. Keep cables tucked out of reach so paws and small hands can’t grab them, and check the mount and bracket every few months for loose screws. A wall mounted TV anchored into studs should never wobble when you touch the frame. If yours does, have a professional take a look.
Professional Installation: When to Consider It
Sometimes it’s best to leave TV mounting to professionals like our team at Geeks on Site. Professional installation ensures safety, accuracy, and efficiency. We bring specialized tools to make the process faster and safer. A professional installer brings mounting hardware matched to your wall’s materials, hides wires cleanly, and confirms each bracket is anchored into solid framing or studs.
When deciding whether to mount a TV yourself or hire, factors such as your experience, the wall type, and the size of your TV all play a major role. If you’re still asking yourself, “Is it hard to mount a TV on my wall?”, the answer often comes down to the surface. Brick, concrete, plaster, a fireplace wall, or a screen over 65 inches are all good reasons to call a professional for the installation.
Tips for a Successful TV Mounting
Here are a few final tips we always recommend for a wall mounted TV installation:
- Use a level during every step
- Ensure the bracket is straight before tightening bolts
- Map out cable access to avoid blocked ports
- Use painter’s tape to visualize placement beforehand
- Double-check the weight limits on both the TV mount and the anchors
- Keep all screws and small parts in a cup so nothing goes missing
- Test the tilt or swivel of the bracket before you attach the cables
- Confirm both lag bolts sit in studs, not just drywall
- Call a professional if a bolt spins without biting into wood
These small steps can make a big difference in the final outcome and help prevent common TV mounting mistakes.
Professional Service from Geeks on Site
We offer expert TV mounting services that include:
- Cable management for a clean, organized setup
- Installation of the TV mounting bracket
- Securing and stabilizing your TV
- Testing and ensuring the TV is safely mounted
Our technicians are trained and certified to mount LED, LCD, and OLED TVs. Prices start at $89 and vary depending on specific needs. We also offer complementary services such as soundbar installation and home theater setup to enhance your viewing experience. On every professional install, our technicians anchor the TV bracket into studs or masonry, attach the TV to the mount, and test everything before we leave.
Summary
Mounting a TV doesn’t have to be difficult. So, is it hard to mount a TV? Not when you take it one step at a time. With the right tools, proper planning, and an understanding of the process, you can complete the installation successfully. A wall mounted TV can free up floor space and give the room a cleaner look. If you’d rather skip the DIY route, professional installation takes the pressure off.
But, if you need help, Geeks on Site will handle everything from wall evaluation and tool preparation to avoiding common mistakes.
Frequently Asked Questions
What tools do I need for DIY TV mounting?
You’ll need a stud finder, power drill, toggle bolts, and a level. Make sure your mount supports your TV’s weight. You’ll also want a tape measure for spacing, a socket wrench to drive lag bolts into the studs, and anchor materials that match your wall.
Why is it important to use the right wall for TV mounting?
Choosing the right wall ensures stability, proper positioning, and safe anchoring into studs.
What are the benefits of professional TV installation?
Professional installation ensures secure mounting, proper tools, and peace of mind. A professional also brings experience with tricky surfaces like plaster and masonry.
How much does professional TV mounting cost?
Most installations cost between $150 and $360, depending on TV size and wall type.
Can I mount a TV above a fireplace?
You can, but heat and height are both concerns. Check your TV manufacturer’s heat guidelines first, and use a pull-down or tilting TV mount so it doesn’t sit too high for comfortable viewing. Since chimneys are often brick or stone, this installation is usually a job for a professional.
Last Updated on September 24, 2026