TL;DR: Use a ceiling mount rated for your TV and ceiling angle, secure it to structural framing, and adjust the screen for a level viewing angle.
In this guide:
- Why mount a TV on a slanted ceiling?
- Ceiling mount vs. wall mount on a slanted ceiling
- What you’ll need
- Before you start
- How to mount a TV on a slanted ceiling step by step
- Common mounting mistakes to avoid
- Wrapping up
- FAQs
Mounting a TV on a slanted ceiling takes a little more planning than a standard wall installation, but the basic idea is the same: the mount needs solid structural support and has to keep the screen level even when the surface behind it isn’t.
The biggest difference is the hardware. A standard wall mount isn’t designed to compensate for a ceiling pitch, so you’ll need a ceiling mount that supports your TV’s size and weight, matches its VESA pattern, and can adjust to the angle of the ceiling. A slanted ceiling TV mount uses an adjustable ceiling bracket that lets the pole hang straight down while allowing you to tilt and swivel the TV toward the seating area.
Why mount a TV on a slanted ceiling?
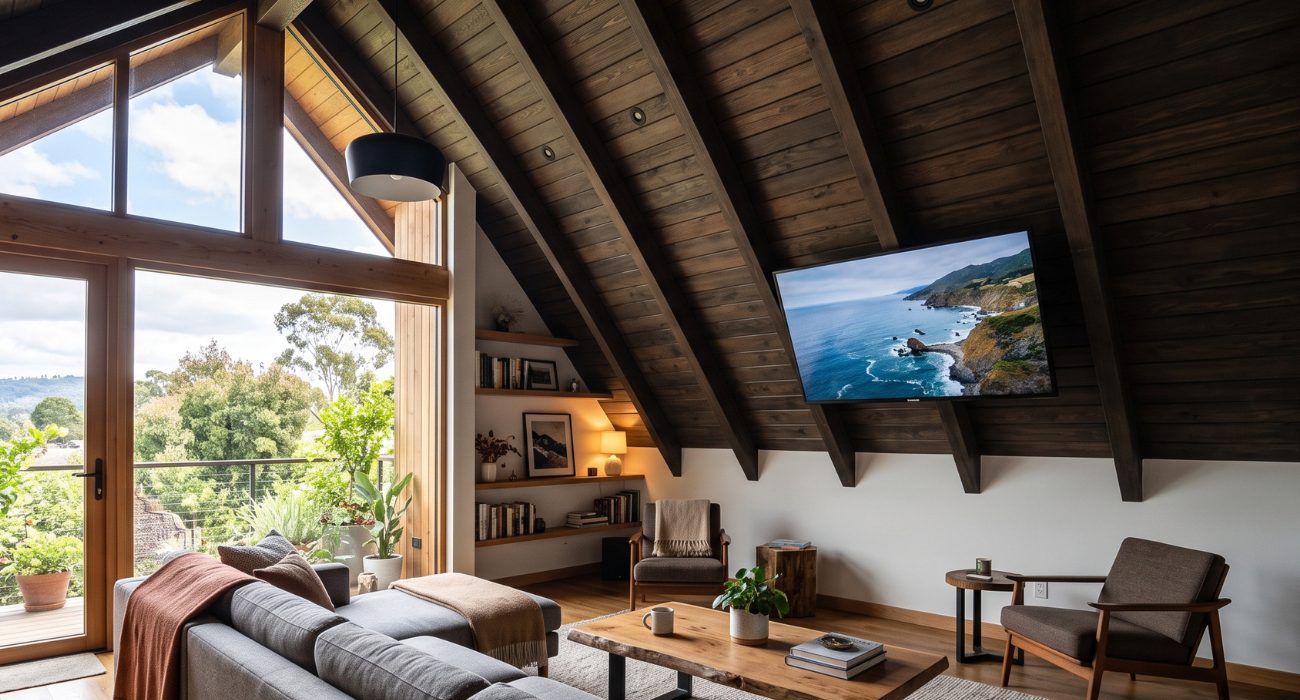
In rooms with vaulted or sloped ceilings, there isn’t always enough vertical wall space for a traditional TV mount. That’s especially common in converted attics, A-frame homes, lofts, and bonus rooms where the roofline takes up most of the wall. In those spaces, a ceiling TV mount puts the screen where you can actually see it instead of squeezing it onto a short knee wall.
Also, a ceiling mount can make sense in a home theater or bedroom where you watch TV from a reclined position. Depending on the mount, you can lower, tilt, or swivel the screen toward the seating area instead of forcing a wall-mounted TV into an awkward spot. Mounting from above can also help you keep flat screen TVs away from the glare of a skylight or dormer window.
Ceiling mount vs. wall mount on a slanted ceiling
You don’t always need a ceiling mount just because a room has slanted ceilings. If there’s a vertical wall at a comfortable viewing height with solid framing behind it, a standard TV mount on that wall is usually the simpler installation. Wall mounts are easier to find, tend to cost less, and don’t hang the TV out over the room.
A ceiling mount makes more sense when the only open wall space sits too low, too high, or behind furniture, or when the roofline angles over the spot where the TV needs to go. Some wall mounts with a long extension arm can reach past a short knee wall, but they aren’t designed to attach to the slope itself. If the surface you plan to drill into is angled, you need a mount built for an angled ceiling. Making the right choice comes down to the room layout, your TV’s screen size, and how much space the ceiling angle leaves you to work with.
What you’ll need
-
- A ceiling TV mount rated for sloped or angled ceilings and compatible with your TV’s size, weight, and VESA pattern
- Stud finder to locate the structural framing behind drywall or ceiling panels
- Drill and the correct bits for your ceiling material and hardware
- Level to check alignment before and after installation
- Measuring tape and pencil for marking the mounting location
- Wrench or socket set for tightening the mounting hardware
- A second person, since lifting a TV overhead alone is a bad idea regardless of screen size
- A stepladder appropriate for the height of the installation
- A cable raceway or cord cover if you plan to run cables along the wall or ceiling
Extra hardware may be needed depending on whether the ceiling is wood-framed, drywall over joists, or concrete. Whatever the mount comes with, follow the manufacturer’s instructions for that specific material. Lag bolts are common for wood framing, while concrete usually calls for masonry anchors, so check which type of screws and anchors your mount supports before you start.
If you’re missing anything, our guide to the tools you need to mount a TV covers the basic hardware and equipment used for a typical installation.
Before you start
Choose the right mount for an angled ceiling
Not every ceiling mount handles a slope, so before buying anything, check four specs against your setup.
📺 TV size
Check both your TV’s screen size and actual weight against the mount’s specifications. Screen size alone isn’t enough: two 65-inch TVs, for example, can have different weights and mounting requirements, so make sure your TV falls within the manufacturer’s listed size and weight limits. You can find the exact weight for your TV model in the manual or on the spec sheet, usually listed with and without the base stand. Choose a mount with a weight rating that comfortably accommodates your TV rather than one that puts the screen right at the mount’s stated limit. If you’re mounting a 55-inch screen, our guide to choosing the best TV mount for a 55-inch TV can help you narrow down the right option for your setup.
🔩 VESA pattern
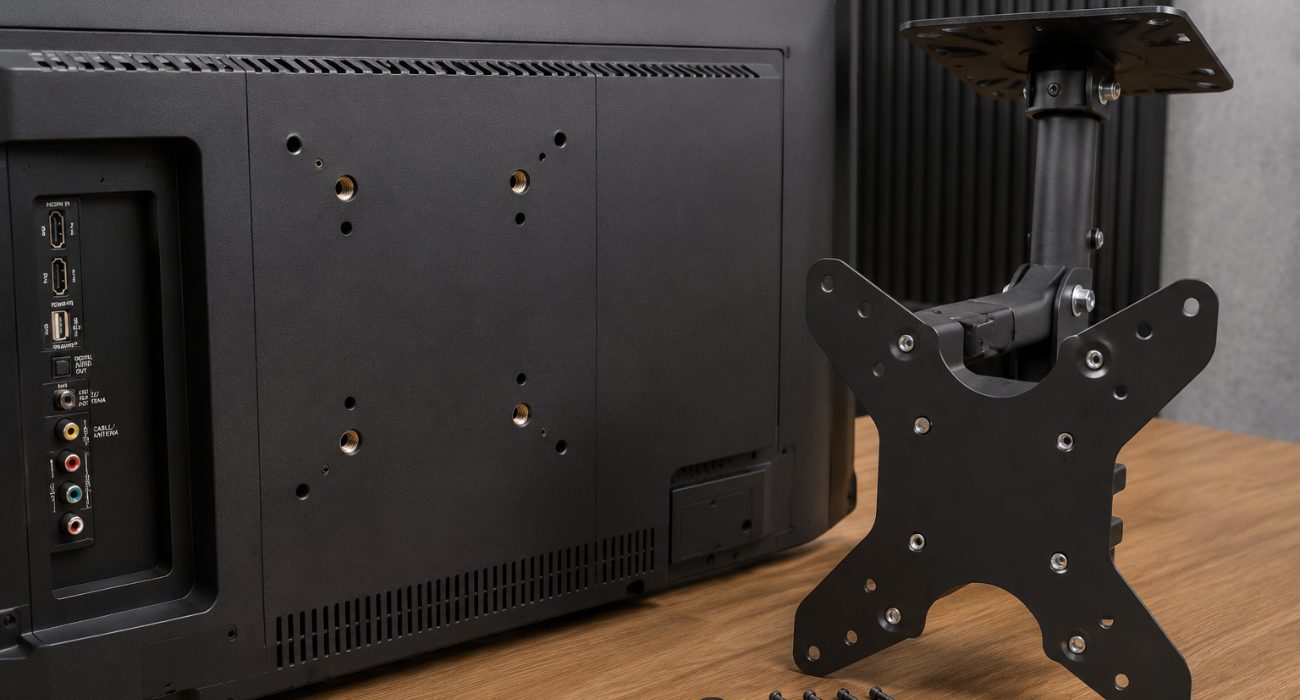
This is the rectangular bolt pattern on the back of your TV, measured in millimeters (200 x 200, 400 x 400, and so on). Check your TV’s manual for this number and confirm the mount supports it. Not every TV uses the same pattern. Most modern flat screen TVs use one of the common VESA mounting patterns, so this is usually a quick check. Some older or less common TV models may use a nonstandard mounting pattern, in which case you may need a compatible adapter plate.
📐 Ceiling angle
Check the mount’s supported angle range before buying it, since a plate designed for a gentle slope may not sit correctly on a steep A-frame ceiling. Some mounts use an adjustable or swiveling ceiling plate that allows the pole or arm to hang vertically even when the mounting surface isn’t level. To measure your ceiling angle, hold a digital angle finder (or a level app on your phone) against the slope where the TV will go, then compare that number with the ceiling mount’s listed pitch range.
📏 Drop length
The drop is the distance between the ceiling plate and the TV bracket. On slanted ceilings, the right drop length depends on where the mount sits along the slope: closer to the peak, you may need a longer pole, while lower on the slope, a short one keeps the TV at a comfortable height. A ceiling mount with a telescoping pole lets you fine-tune the height after installation, so check that the pole length the mount supports works with your ceiling height before you buy.
An adjustable mount is often the most practical option for a slanted ceiling because you can fine-tune the tilt or swivel after installation and aim the screen toward the seating area. If you’re still comparing adjustment options, see how full-motion and fixed TV mounts differ before choosing a setup. That flexibility also gives you more control over the final viewing angle once the TV is installed.
Which Type of Ceiling Mount Works Best for Slanted Ceilings?
Ceiling mounts come in a few common styles, and the right one depends on how steep the angled ceiling is and how much you want to move the TV after it’s up.
- Fixed drop mount: A pole hangs from the ceiling plate and holds the TV in one position. It’s easy to install, but it offers little or no tilt, so it works best when the seating area sits directly in front of the screen.
- Adjustable pitch mount: The plate pivots to match the slope, and the TV can tilt and swivel once it’s hanging. This type is well suited to slanted ceilings because the adjustable plate can accommodate different ceiling pitches.
- Motorized mount: Some motorized models can fold the TV toward the ceiling when it’s not in use and lower it with a remote. Not every model supports a pitched ceiling or larger screen size, so check the supported angle, weight capacity, and TV dimensions before you buy.
Find a secure attachment point
Before you drill anything, make sure you know what the mount will actually be attached to. On a drywall ceiling, you’ll typically need to locate a ceiling joist and secure the mount directly to it, since the drywall itself isn’t meant to support the weight of a TV, especially once you add the leverage of an adjustable arm. On slanted ceilings, the framing usually runs up and down the slope, so once you find one joist, the next one is typically 16 or 24 inches over.
Concrete ceilings require a different approach, so don’t assume the hardware used for a wood-framed ceiling will work there too. Check the mount manufacturer’s instructions for the type and size of anchors required for your ceiling material and the weight you’re supporting. Concrete ceiling installation usually needs a hammer drill and anchor hardware rated for the full weight of the TV and mount.
For drywall-covered ceilings, run a stud finder across the area where you plan to install the TV and mark the center of the joist once you’ve found it. Tapping a thin finishing nail through the drywall is a clean way to confirm you’ve hit the joist, and the ceiling plate will cover the hole once the mount is up. If the readings are inconsistent or you can’t tell what’s behind the surface, that’s a good point to stop rather than drilling until you happen to hit something.
Plan the TV position before drilling
Before marking the mounting location, think about where the TV will actually sit once the arm is extended. Your usual viewing position, the ceiling angle, and the mount’s drop length all affect the final height, so check the sightline from the couch or bed and make sure the screen won’t interfere with doors, ceiling fans, or nearby fixtures. As a general rule, the center of the screen should land close to eye level from your seat, or tilt down toward you if the TV hangs higher than that. For a closer look at viewing height and distance, see our guide to TV mounting height and viewing distance.
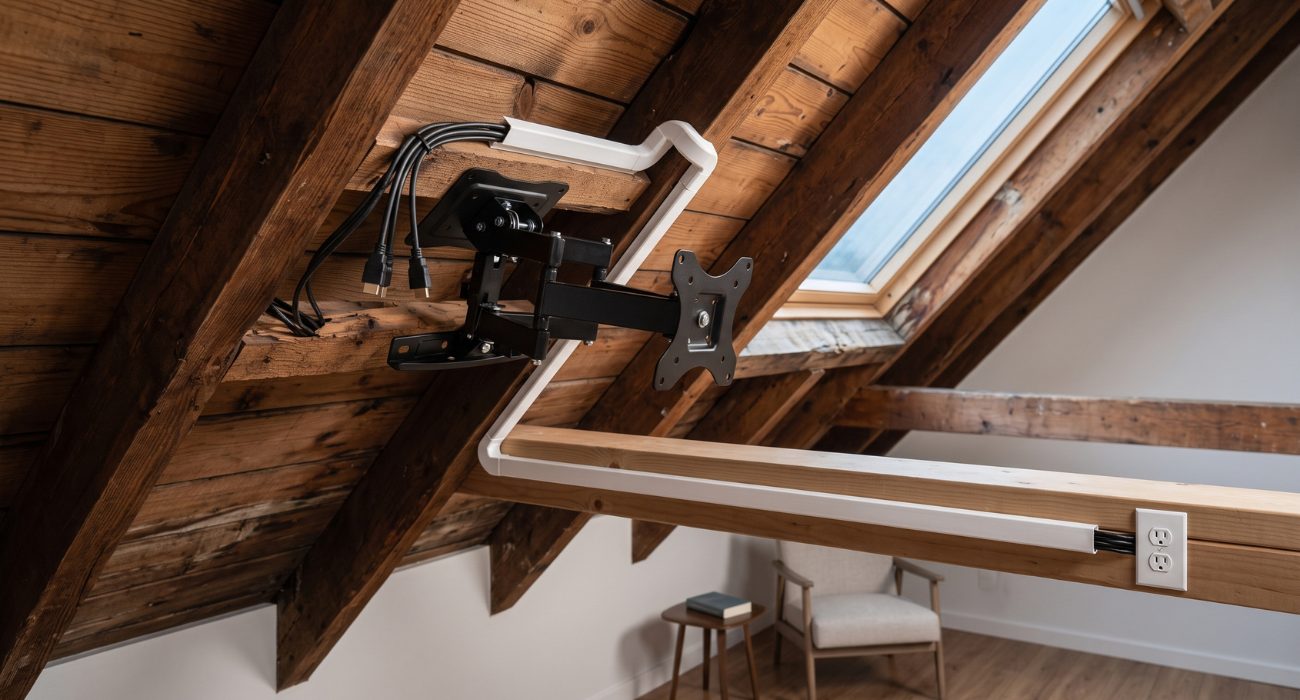
This is also the time to figure out how you’ll get power and any HDMI or other cables to the TV. Ceiling mounts often require longer cable runs than wall mounts, so measure the distance to the nearest outlet and leave enough slack for the TV to tilt or swivel without pulling on the connections. Some ceiling mount models have a hollow pole, so you can route the cables through the center for a tidier look.
A surface-mounted cable raceway can keep longer runs from hanging loose overhead. Run it along the ceiling and down the nearest wall, and paint it to match so it blends in. If you want power concealed inside the ceiling or the installation requires changes to existing electrical wiring, leave that portion to a licensed electrician.
How to mount a TV on a slanted ceiling step by step
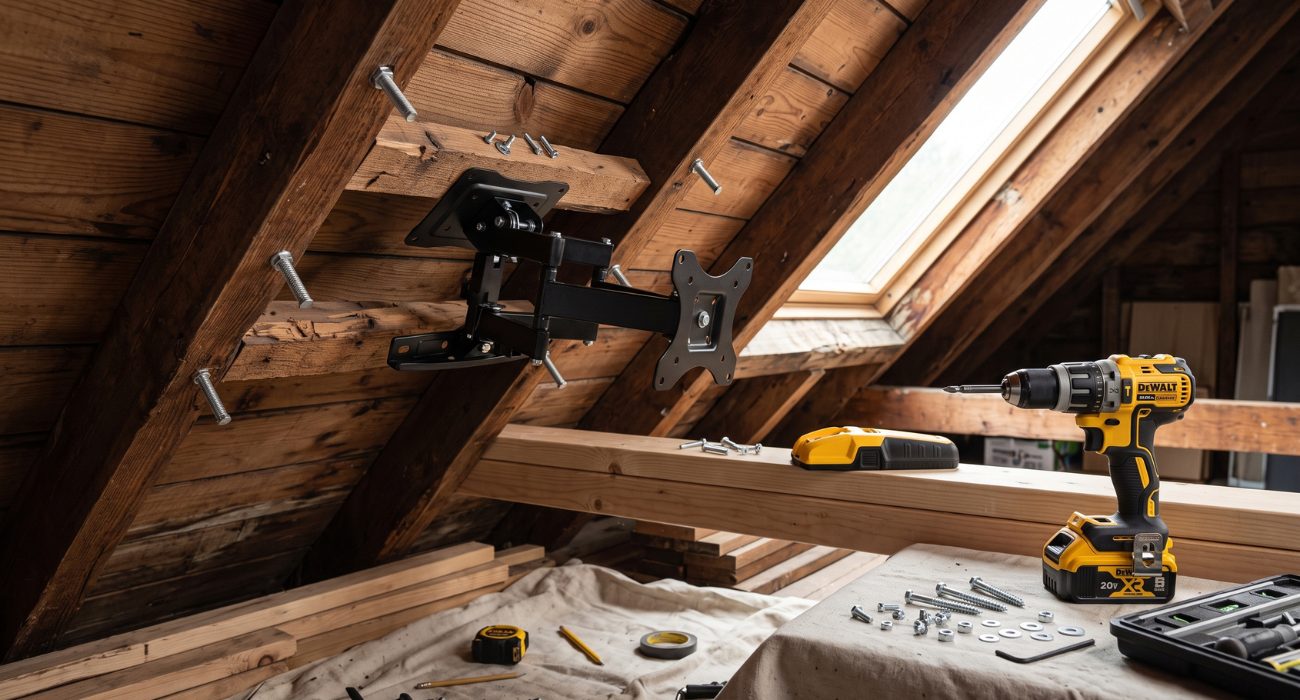
- Locate the structural support. Confirm and mark the joist or other approved attachment point you identified during planning. Double-check your marks with the stud finder, making sure they line up with the center of the joist and not its edge.
- Mark the mounting holes. Position the ceiling plate, check it with a level, and mark your drill points directly over the structural support you found in step one. If the ceiling bracket pivots, set it to your ceiling angle first so the pole will hang straight.
- Drill pilot holes. Match the bit size and depth to your fastener type and ceiling material. Keep the drill perpendicular to the ceiling surface, not to the floor, so the screws go straight into the framing. If the drill hits unexpected resistance or the structure is not where you expected, stop and reassess rather than pushing through.
- Secure the ceiling mount. Install the structural fasteners and tighten them fully. The plate should sit flush against the ceiling with no wobble. Give the mount a firm tug before moving on. If the ceiling plate shifts or wobbles, stop and check the hardware and attachment point again before hanging the TV.
- Attach the mounting bracket to the TV. Lay the screen face-down on a clean, padded surface and attach the VESA bracket using the screws specified for your TV and mount. If a screw doesn’t thread smoothly or seems too long, double-check the required size before continuing. Add the spacers from the mount hardware kit if the back of your TV is curved or has recessed holes.
- Attach the TV to the ceiling mount. With one person supporting the TV, lift it into position and connect it to the ceiling bracket, making sure every locking clip and safety screw is fully engaged before letting go. Follow the mount manufacturer’s instructions for securing the TV to the ceiling bracket, and wait until the screen is fully supported before making the final tilt adjustments.
- Adjust the tilt and swivel. Angle the screen toward the seating area and compensate for the ceiling slope, then tighten the adjustment hardware so the position holds over time. Sit in your usual spot while your helper handles small adjustments, making sure the screen looks level and free of glare.
- Check the mount and cable clearance. Before you’re done, check that the TV stays level, all locking hardware is secure, and the cables have enough slack for any tilt or swivel movement. Move the TV through its full range once to make sure nothing snags or pulls loose. Follow the mount manufacturer’s guidance for any recommended hardware checks after installation.
Common mounting mistakes to avoid
- Mounting into drywall alone. The mount needs to connect to structural framing or another surface specifically approved by the manufacturer. Drywall can’t hold the weight of a TV on its own, and even heavy-duty drywall anchors aren’t a substitute for a joist.
- Using wall mounts on a sloped ceiling. A standard TV mount made for a vertical wall won’t compensate for the pitch, so the TV can hang crooked and put uneven stress on the hardware.
- Guessing at the angle. Measuring the ceiling angle takes a minute and tells you right away if the mount supports your slope.
- Skipping the final level check. A small alignment problem becomes much more noticeable once the TV is hanging.
- Using a mount that doesn’t support the ceiling angle. Check the manufacturer’s listed slope or angle range before installation.
- Forgetting to recheck the hardware. Before hanging the TV, make sure the ceiling plate is secure and doesn’t shift or wobble.
- Exceeding the mount’s weight rating. Check the rating for the complete mount and its adjustable components, not just the ceiling plate.
- Leaving the cables too tight. Cables pulled taut can strain the ports or loosen the connections every time you tilt or swivel the screen.
Wrapping up
Mounting a TV on a slanted ceiling is mostly a matter of planning for the angle before you start drilling. Once you’ve matched the mount to the TV, found solid structural support, and worked out the final viewing position, the installation itself follows many of the same steps as a standard TV mount. With the right mount and a secure installation, slanted ceilings can give you a viewing spot a standard wall never could, especially in rooms where you mostly watch TV from the couch or bed.
If you’d rather leave the overhead installation or cable setup to a technician, Geeks on Site offers TV mounting services for slanted ceilings, home theaters, and other setups where a standard wall mount isn’t the best fit. Our technicians can help you pick a ceiling mount that fits your TV and ceiling, install it into the framing with the right hardware, and make sure everything is secure before they leave.
FAQs
Can any TV be mounted on a slanted ceiling?
Many flat-screen TVs can, as long as there’s a compatible ceiling mount for the TV’s weight, VESA pattern, and the angle of the ceiling. Check both the TV and mount specifications before installation.
Can I mount a 65-inch or 75-inch TV on a slanted ceiling?
Yes, as long as the ceiling mount is rated for the TV’s size and weight and can be securely attached to the ceiling structure. Larger TVs can also be awkward to lift overhead, so plan on having at least one other person help with installation.
How high should a TV be mounted on a slanted ceiling?
There isn’t one ideal height for every room. Base the final position on your seating height, viewing distance, ceiling angle, and how far the mount extends, then check the sightline from the couch or bed before drilling.
Do all TVs have mounting holes on the back?
Many modern flat-screen TVs use a standard VESA mounting pattern, but not every model does. Check the back of the TV or its manual for the VESA measurements before choosing a mount; some models may require an adapter.
Last Updated on September 28, 2026