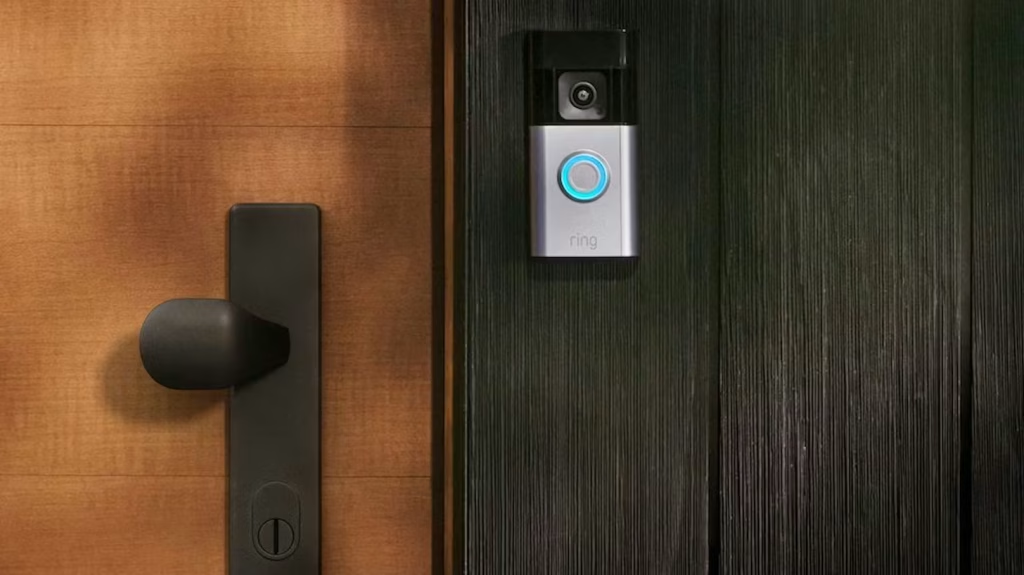
Installing a Ring doorbell camera is one of the most practical upgrades you can make to your home. We’ve walked dozens of homeowners through this process, and the good news is that most people complete their first install in under an hour with just a few basic tools.
In this guide, we cover everything from charging your battery to mounting the device and testing your motion zones.
Key Takeaways
- A complete Ring doorbell installation typically takes 30–60 minutes with basic tools like a Phillips screwdriver and a drill with a 1/4 inch masonry bit.
- Always charge the battery fully before mounting, even if you plan to connect the device to existing doorbell wiring later.
- Mount your doorbell approximately 4 ft (1.2 m) above the ground for optimal motion detection and face visibility.
- Complete the Ring app setup while holding the device in your hand.
- This guide covers both battery-only installations and optional hardwiring to an existing chime or transformer (one power source at a time).
What you need before installing a Ring Doorbell Camera
Before you start, gathering the right tools and confirming compatibility will save you from frustrating mid-install surprises. We recommend spending five minutes on prep work to ensure a smooth process.
Tools you’ll need
- Phillips head screwdriver
- Small flat-head screwdriver (for removing old doorbell buttons)
- Power drill with 1/4 inch (6 mm) masonry bit (for brick or stucco)
- Pencil and tape measure
- Spirit level (optional but helpful)
What comes in the box (2024 models)
- Mounting bracket
- Mounting screws (bag A)
- Wall anchors (bag A)
- Security screw and screwdriver bit (bag B)
- USB charging cable
- Optional Wedge or Corner Kit (sold separately)
Before you begin
- Confirm your existing setup: no doorbell (battery-only), wired chime (16–24 VAC transformer), or low-voltage transformer only
- Check that your Wi-Fi router broadcasts a 2.4 GHz network and is powered on
- Download the latest Ring app on your iOS or Android smartphone
- Take a quick photo of any existing doorbell wiring before disconnecting; this becomes your reference if anything goes sideways
Charging and preparing your Ring Doorbell battery
Every new install should begin with a full battery charge, even if you plan to hardwire the device later. A dead battery during setup will trigger unnecessary troubleshooting and delays.
For removable battery models
- Press the release tab on the faceplate and slide it off
- Remove the battery pack by pressing the release button
- Connect the battery to the included micro-USB or USB-C cable
- Charge until the indicator shows solid green (typically 5–8 hours on first charge)
For built-in battery models
- Plug the entire unit into a USB power source using the provided cable
- Wait until the LED ring or status LEDs stay fully lit, indicating a complete charge
Safety tips to keep in mind
- Use only low-power USB chargers (5V/1A or 5V/2A)
- Charge indoors and away from moisture
- Avoid off-brand fast chargers that aren’t certified for the device
While your battery charges, you can move ahead to Wi-Fi prep and account creation in the next step to save time.
✏️ If you’re replacing an existing Ring doorbell, you’ll need to take it down first. Check out our step-by-step guide on how to remove a Ring doorbell before you start the install.
Setting up your Ring Doorbell Camera in the Ring app
We always complete the app setup and Wi-Fi connection while holding the doorbell in hand, before mounting it to the wall. This approach lets you troubleshoot connectivity issues without climbing a ladder.
Step-by-step app setup
- Download or open the Ring app on your smartphone
- Create a new Ring account or sign into your existing one
- Tap “Set Up a Device” and select “Doorbells”
- Scan the QR code or MAC ID on the back of the doorbell (or inside the packaging)
- Follow the on-screen instructions to begin pairing
Connecting to Wi-Fi
- The app will prompt you to press and hold the setup button on the doorbell
- Your phone will connect to the temporary Ring Wi-Fi network
- Select your home Wi-Fi network (must be 2.4 GHz) and enter your password
Test before you mount
Once Wi-Fi is connected, use Live View while holding the device roughly where you plan to mount it. This lets you watch the video feed and check audio quality. If the signal strength shows weak, you’ll know to relocate your router or add a Wi-Fi extender before drilling holes.
We recommend setting basic preferences now: motion detection zones, notification settings, and chime choices if you’re using a Ring Chime or connecting to an Amazon Echo.
During setup, your Ring doorbell may flash blue while connecting to Wi-Fi or installing updates. If you’re unsure what the light means, here’s a complete guide to Ring doorbell flashing blue.

Choosing the best location and height for your Ring Doorbell
Correct placement directly affects motion detection accuracy, face visibility in videos, and how often false alerts trigger from street traffic or passing cars.
Mounting height
Install your doorbell approximately 4 ft (1.2 m) above the ground, roughly chest height for most adults. This positioning ensures the camera captures faces rather than the tops of heads, regardless of your door’s height.
Getting the mounting height right is only half the equation. For guidance on where to place ring cameras across your whole property, not just the front door, check out our full placement guide.
Choosing the right spot
- Select a location with a clear view of the approach path to your door
- Avoid mounting directly behind a screen door or in a deep recess where motion detection becomes blocked
- Ensure the camera can see visitors before they reach your doorstep
If one doorbell does not cover every entrance, you can add another at a back door, side gate, or even a second property and manage both through the same Ring account.
When to use Wedge or Corner Kits
- Wedge Kit: Tilts the camera downward for unusually high mounting positions
- Corner Kit: Angles the camera away from busy streets, sidewalks, or direct sunlight that could wash out the image
Check Wi-Fi signal strength
If the Ring app shows poor signal during your Live View step, consider relocating your router closer to the front door or installing a mesh Wi-Fi extender.
For renters
Prefer non-destructive installation methods like adhesive mounting plates or using existing screw holes. Always confirm with your landlord before drilling into exterior walls.
Preparing the mounting surface and installing the bracket
This section covers drilling, anchor use, and bracket mounting for typical surfaces including wood, stucco, brick, and vinyl siding.
Marking hole positions
- Hold the mounting bracket against the wall where you want the doorbell
- Use a pencil to mark the four screw hole locations
- Use a spirit level to ensure the bracket sits straight
Drilling pilot holes
| Surface Type | Drill Bit | Anchors Required |
| Wood | Standard bit or self-tapping | Usually no |
| Brick/Masonry | 1/4 inch (6 mm) masonry bit | Yes |
| Stucco | 1/4 inch (6 mm) masonry bit | Yes |
| Vinyl Siding | Standard bit | Optional |
For masonry surfaces, drill pilot holes at your marked positions, then insert the wall anchors from bag A before driving the screws.
Securing the bracket
Use the supplied mounting screws (bag A) to secure the bracket to the wall. Tighten until snug but avoid overtightening, which can crack the bracket or strip the anchors.
Using Wedge or Corner Kits
Mount the accessory kit to the wall first using the provided hardware, then attach the main doorbell bracket to the kit using the shorter bracket screws.
Keep any existing wiring accessible through the center hole of the bracket if you plan to connect power in the next step.
Connecting optional power sources
Ring doorbells run perfectly fine on battery alone, but we often recommend adding a trickle-charge source if you want fewer manual recharges throughout the year.
Important rule: Use only one power source at a time, battery alone, battery plus solar charger, battery plus plug-in adapter, or battery plus existing doorbell wires. Never combine multiple charging sources.
Solar charger installation
- Mount the Ring Solar Charger backing where it receives several hours of direct sunlight daily
- Attach the doorbell or bracket according to the manufacturer’s instructions
- The solar panel will trickle-charge your battery automatically
Plug-in adapter installation
- Route the low-voltage cable from an indoor outlet to the back of the doorbell
- Connect the two wires to the terminal screws on the device
- Secure the cable with clips to keep it tidy and protected from weather
Connecting to existing doorbell wiring (Ring wired doorbell setup)
- Turn off power at the breaker; this step is non-negotiable for safety
- Disconnect the old doorbell button from the low-voltage wires
- Attach both wires to the Ring doorbell terminals (one wire per screw)
- Confirm your transformer voltage is in the supported range (typically 16–24 VAC)
- Restore power at the breaker
After restoring power, open the Ring app and check your chime settings. Select the correct chime type if using an in-home mechanical or digital chime.
Mounting the Ring Doorbell and securing it safely
With power connected (if applicable), it’s time to attach the doorbell to the bracket and lock it in place with the security screw.
For models with removable batteries
- Insert the fully charged battery until it clicks into place
- Align the doorbell with the top tab of the mounting bracket
- Hook the device onto the tab
- Press the bottom of the doorbell inward until it sits flush against the bracket
For models with built-in batteries
- Hook the upper edge of the device into the mounting bracket’s top tab
- Push the bottom of the unit inward until it snaps securely into place
Installing the security screw
Insert the specialized security screw at the bottom of the doorbell using only the provided star-shaped screwdriver bit. Using incorrect screws can damage the battery and create a fire hazard—this is a critical safety requirement, not just a suggestion.
Post-mount verification
After mounting, the LED ring should light briefly. Open the Ring app and confirm:
- Live View displays clear video
- Audio works in both directions
- Motion alerts trigger appropriately
- Your chime rings (if connected)
Run a test
Ring the doorbell from outside to check notifications. Walk through expected motion paths and adjust sensitivity or zones in the app if alerts are too frequent or too sparse.
Final checks, settings, and ongoing maintenance
Consider this your post-install checklist plus basic maintenance guidance for keeping your Ring doorbell reliable over the long term.
Fine-tune your settings
After a day or two of real-world use, revisit motion settings, schedules, and privacy zones in the Ring app. You’ll likely want to exclude areas like busy sidewalks or your neighbor’s driveway to reduce unnecessary alerts.
If something doesn’t work as expected after installation, our complete Ring doorbell troubleshooting guide walks through common problems like Wi-Fi issues, delayed notifications, battery drain, motion detection problems, and more.
Check video quality at different times
Watch recorded videos from morning, evening, and nighttime to ensure night vision, HDR, and WDR perform well in your chosen location. Relocate the device if direct sunlight causes persistent glare or if night vision struggles with nearby reflective surfaces.
Battery maintenance
- Expect to recharge every 2–6 months for high-traffic doors if not hardwired
- Set a reminder in the Ring app when battery level falls below 20%
- Consider adding a solar charger if frequent recharging becomes inconvenient
Physical maintenance
- Wipe the camera lens and body with a soft, dry cloth every few months
- Verify the security screw remains tight
- Inspect for water ingress after heavy rain or snow
- Remove any protective film you may have missed during setup
Explore advanced features
The Ring app offers linked devices, smart alerts that distinguish people from general motion, and integrations with other compatible smart home products. Take time to explore these options once your basic setup is working smoothly.
Keep reading: How to Setup Your Ring Doorbell That Is Already Installed
Final Thoughts
Installing your Ring doorbell is not a difficult task, you just need the right tools and a little patience. Of course, if you think you need assistance with the process or maintenance, you can get in touch with Geeks on Site. We’ll help you installing your doorbell and any smart device you need in your home.
Contact Geeks on Site for professional support today!
Last Updated on August 6, 2026