Disconnecting a hard drive from a desktop computer intimidates most users, but it is a skill that can be beneficial. Whether it is to replace a hard drive with a new one, troubleshoot an issue, or recycle an old PC, knowing how to disconnect the hard disk drive (HDD) is an unparalleled skillset. This tutorial will walk you through the various steps involved in pulling a hard drive out of the computer, and backing up your files to the moment you remove the hard drive. That way you know what to expect and can work on this task to the best of your ability.
Understanding the Importance of Removing Your Hard Drive From A Computer
The hard drive is the safe of your digital existence; it safeguards everything from precious family photographs to important personal documents. So, taking it out is not merely physical labor; it is an added security step for your data. So whether you’re replacing it with a bigger drive, replacing a dead one, or need to get rid of it, removing a hard drive is a responsible method of safeguarding your information from prying eyes or loss. The absence of privacy in today’s data breach landscape where identity theft occurs, turns having privacy into a fundamental necessity. Your data remains secure when you entrust your computer to other people because password protection safeguards it from unauthorized access.
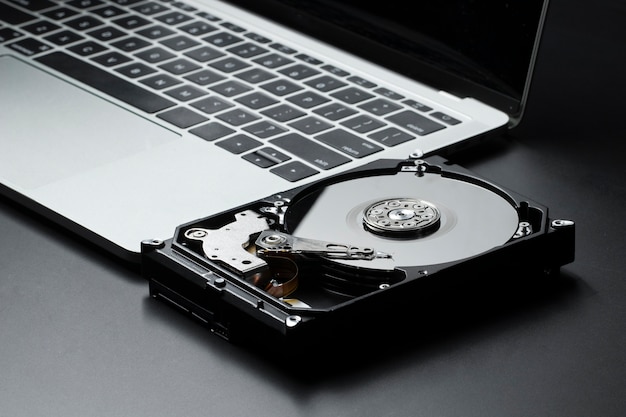
Preparation: Backup Your Data
Before you go ahead and remove a hard drive, prepare by backing up your files. Data backup is a form of insurance for your digital files—it’s there to restore your files when unforeseen hardware failures happen, or when you’re upgrading to a new drive. This task does involve duplicating files on an auxiliary medium, such as a spare hard drive or cloud storage provider like Google Drive, without anything getting lost in the process. It’s an easy but important habit that maintains the integrity of your data against the hazards of drive removal and installation. By locking down your data in advance, you’re not only getting ready for hardware replacement; you’re preserving your sanity because you know your online life is secure and intact.
Safety First: Turning Off Your Computer and Preparing Your Workspace Before You Remove Hard Drive
Safety is of utmost importance when disconnecting a hard drive from a computer. The procedure starts with making sure that your computer is fully powered down—not just in sleep or hibernation mode—and removed from any source of power. This is the most important step to safeguard both you and the computer parts from electrical risks. Select an area with enough light and no distractions for your workspace preparation, since this will help you maintain visibility while organizing screws and cables during the process. Before touching computer internals you should ground yourself to protect the electronic devices from static electricity damage. Touching a metal object with clear grounding helps achieve this.
Locating the Hard Drive in Your Desktop or Laptop
It is simple to locate a hard drive inside your desktop PC although you need basic knowledge about your machine’s inner layout. You will find the hard drive fixed by itself as a separate unit within the framework of the computer case inside a specific hard drive bay. It’s usually positioned close to the front of the desk to permit ease of use and cable access. It’s not so much an issue on a laptop with its limited room, but even then, a hard drive might be accessed via the panel along the bottom of the machine. In both designs, the hard drive is accessed via a SATA cable from the motherboard and a different power lead. Identifying the hard drive is the first step in the removal process, whether you’re working with the expansive interior of a desktop or the compact arrangement of a laptop.
Disconnecting the Cables and Mounting Screws
Gently unplug all the cables connected to the hard drive, such as the SATA and power cables. Unscrew the screws holding the hard drive in place using a screwdriver. A few newer cases for hard drives have a switch or lever that releases the drive tool-free.
Removing the Hard Drive from Its Bay
When you pull the screws and cables, slowly move the hard drive out of the bay. Be cautious in case of any extra screws or holding devices. You should never try to yank or shove it since that would ruin the computer or drive.
Need To Remove Your Hard Drive? Handling the Hard Drive After Removal
The hard drive needs to be placed inside an anti-static bag for protection following removal. You should seek professional help for hard drive disposal because they will completely remove all data. Handle your drive with care when you want to install it in another PC system.
What to Do with the Old Hard Drive?
After safely removing an old hard drive, you have a choice about how to reuse or recycle it. If the drive is still operational, you can convert it into an external storage device with a suitable enclosure, seeing it given a second lease of life for backups or additional storage. Otherwise, if you care about data safety or if the drive is unreliable, you might opt to erase the drive physically or delete data using software means before recycling it. You may also hire special services to safely erase and recycle the drive such that your data cannot be restored once you send it out.
Troubleshooting Common Issues When Removing a Hard Drive
Before attempting the hard drive removal process remember to first turn off your computer and disconnect it from power. The drive will not move if there are any hidden screws or clips in place. When you need to force anything during your repairs you likely missed the mark.
Final Thoughts: The Benefits of Learning to Remove a Hard Drive
Hard drive removal is a useful skill that can save you money and time. It involves less technical know-how than you would imagine and gives you a better idea of how your computer operates. And it’s the starting point for upgrading your system or protecting your data before you dispose of it.
Conclusion – Need To Remove Computer Hard Drive?
In conclusion, the process of extracting a hard drive from your desktop is not just a technical exercise; it’s a right of passage for all computer users today. It’s about reclaiming your technology, learning about its guts, and making your own choices about upgrades, security, and recycling. The process reveals the true nature of your office box so you can shift from using it as an automated appliance into a workable platform as the master who handles maintenance and protection. You decide to uncover the device and hold its drive because this action transforms you into someone who watches over their digital domain while understanding that any upcoming task becomes achievable with complete competence. Reach out to us today to experience top-quality services at reasonable rates.
Last Updated on April 21, 2025